Step 1 Initial Layer of Wax
|
|
|
With the prepared tooth in your hand (not screwed into the typodont), apply a thin layer of BLUE wax to the entire preparation. The wax should be of even thickness (approximately 0.5mm) and cover the entire surface of the preparation (prepared tooth surface). The wax should go to and slightly beyond the cavosurface margin of the preparation initially. Remove gross excess wax now. The final finishing and refinement of the margins will be managed at a later stage in the waxing procedure. The margins will be sealed and properly contoured using the beavertail portion of the BEAVERTAIL/ACORN burnisher in one of the last steps of the procedure. Use the PKT1 instrument to apply the wax. There should be no voids in the wax. The type of margin around the preparation is supragingival and near the CEJ (cementoenamel junction). The type of margin is called a chamfer. The margin of the preparation is smooth and continuous. Therefore, if there is any irregularity or discontinuity in your waxed margin, the waxing is incorrect and requires modification.
|
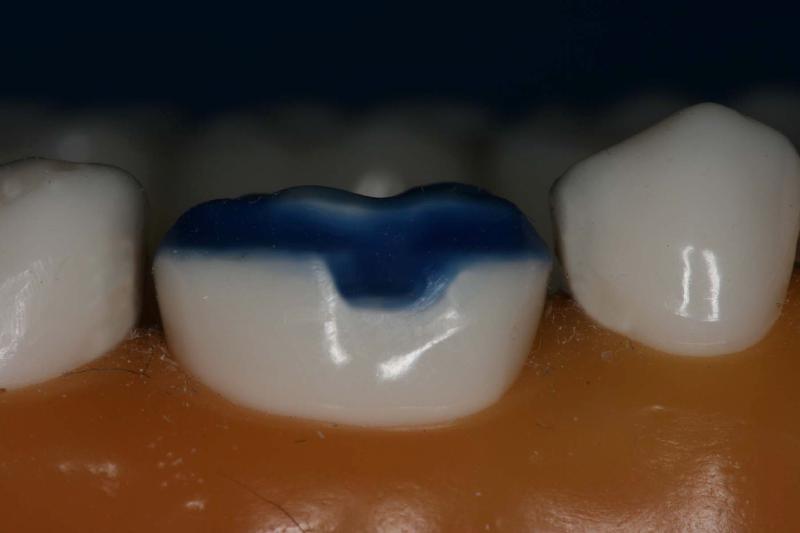
Initial layer of wax
Buccal View
|
|
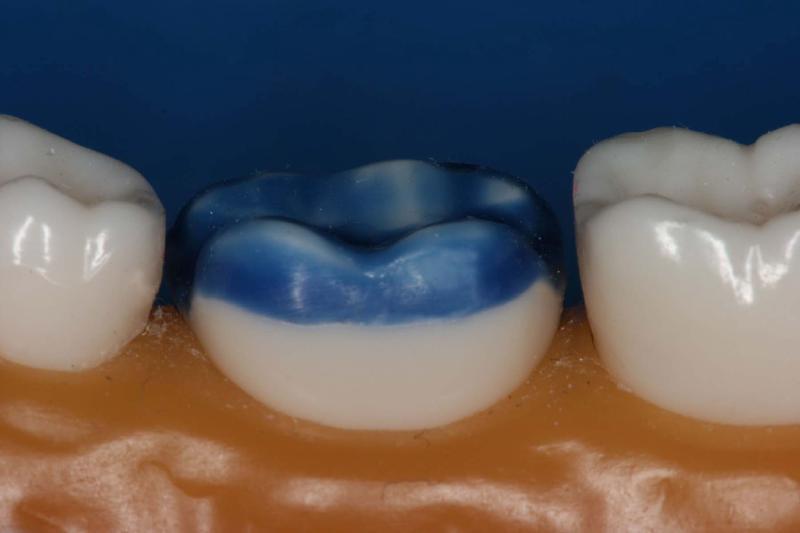
Initial layer of wax
Lingual View
|
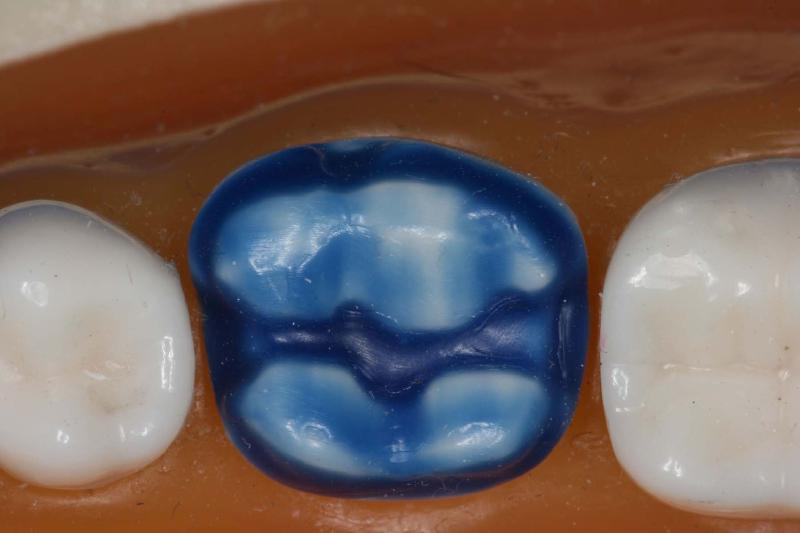
Initial layer of wax
Occlusal View
|
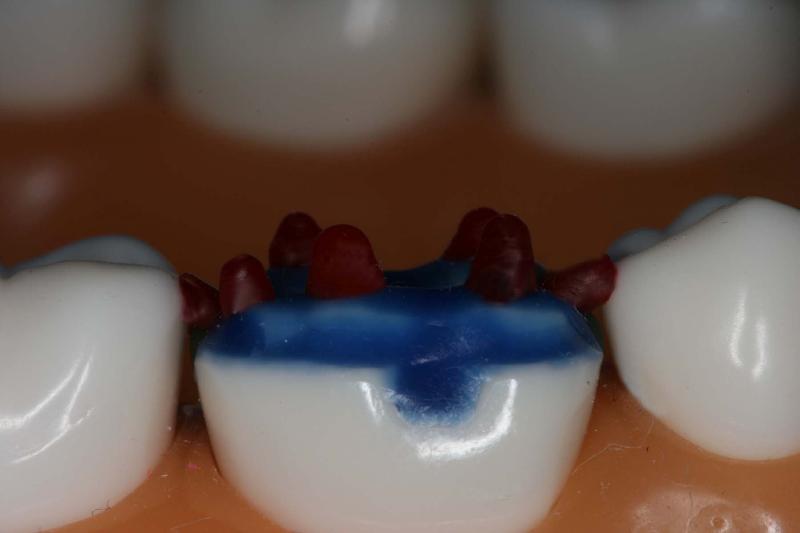
Step 2 Establishing Mesial and Distal Contacts & Cusp Tips
|
|
|
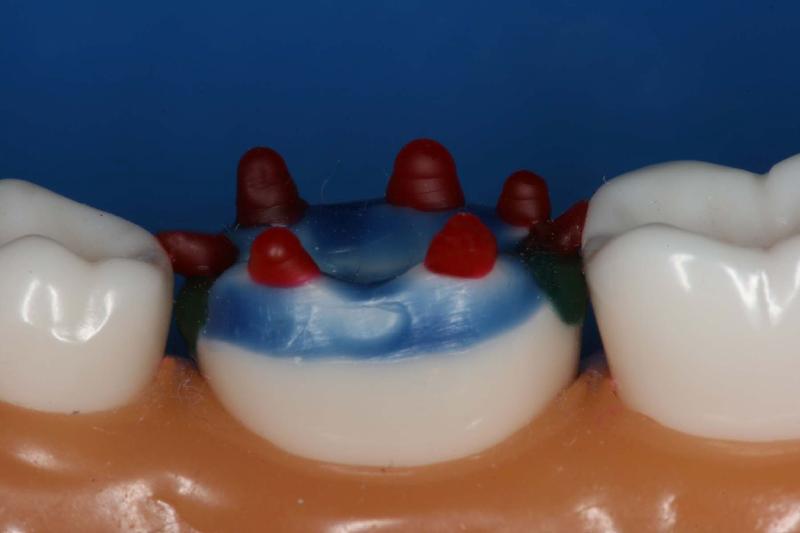
With the prepared tooth out of the typodont, fill in each of the proximal boxes with GREEN wax so that the contact bars can be placed in the next step. Screw the prepared tooth into the typodont. Using RED wax and the PKT1 instrument, add a cone to contact the distal portion of the adjacent mandibular second premolar and the mesial of the mandibular second molar. This step establishes the contacts that must be maintained throughout this exercise. The position of the contacts coincides with the mesial and distal crests of curvature of this tooth. The mesial crest of curvature is at the junction of the middle and occlusal third of the crown while the distal crest of curvature is in the middle third of the crown. Evaluate the amount and location of the wax cone from the buccal, lingual and occlusal views as shown below.
The mesiobuccal cusp tip is longer than the distobuccal cusp tip, which is longer than the distal cusp and follows the curve of Spee.
All of the cusps are visible from the lingual view as the cusps are offset. In the occlusal view, this is more evident. The contact areas are positioned buccal to centre. The two lingual cones should be kept far apart. In a working side movement, the large mesiolingual cusp of the maxillary first molar has to move over the lingual groove between these two cusps without contact.
|
Mesial and distal contacts, mesiobuccal, distobuccal, distal, mesiolingual and distolingual cusps
Buccal View
|
|
Mesial and distal contacts, mesiobuccal, distobuccal, distal, mesiolingual and distolingual cusps
Lingual View
|
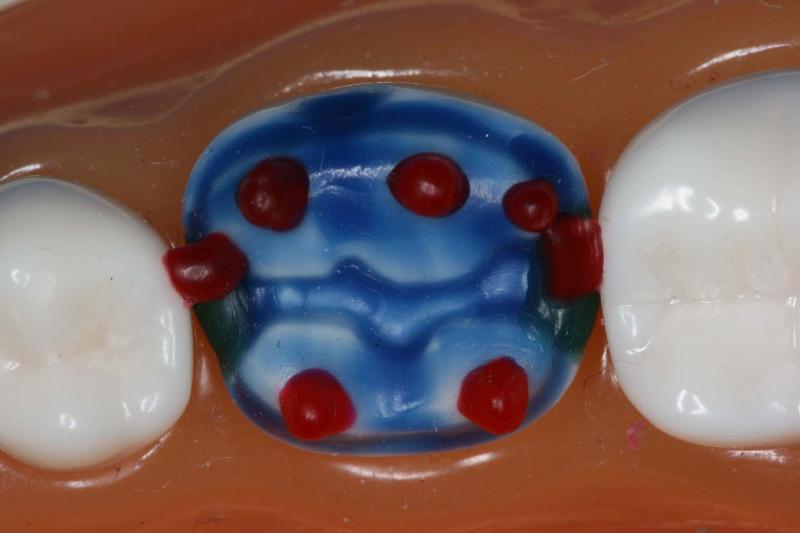
Mesial and distal contacts, mesiobuccal, distobuccal, distal, mesiolingual and distolingual cusps
Occlusal View
|
Step 3 Establishing the Cusp Ridges
|
|
|
Screw the prepared tooth into the typodont. Using a PKT1 and GREEN wax, establish the mesial and distal cusp ridges of the four major cusps and the distal cusp. The GREEN wax of the cusp ridges and the RED wax of the contacts establish the occlusal table of the tooth. Evaluate the amount and location of wax from the buccal, lingual and occlusal views. Adjustments may be made with the tooth in or out of the typodont. The goal is to add the correct amount of wax in the correct location using your wax instruments. Minimal carving should be required.
|
|
Step 4 Establishing the Triangular Ridges
|
|
|
Using a PKT1 and RED wax, build the triangular ridges of the mesiobuccal, distobuccal, mesiolingual, distolingual and distal cusps. Begin by placing the wax near the central developmental groove and draw the wax toward the cusp tip. The triangular ridge of the each cusp should be triangular in shape and convex both mesiodistally and buccolingually. Do the same for the triangular ridges of all five cusps.
|
|
Step 5 Establishing the Contour Bars
|
|
|
Remove the tooth from the typodont to begin this step. Using a PKT1 and GREEN wax, establish contour bars at each of the line angles of the tooth. Establish contour bars from each of the cusp tips to the margin of the preparation. The contour bars should establish the buccal (cervical third) and lingual (middle of the middle third) crests of curvature. Evaluate the position and magnitude of the contour bars both in and out of the typodont. Assess the contacts after adding the lingual contour bars and make sure that the occlusion has not been altered. Carefully close the typodont. If the contacts are heavy, heat the wax using a PKT1 or PKT2 instrument to achieve an ideal location, size and magnitude of the contact. See the final picture for the location and size of the contacts.
|
|
Step 6 Final Steps

This content requires HTML5 & Javascript or Adobe Flash Player Version 9 or higher.
Click and hold the cursor down on the 3D model above to rotate the model (or click on the 3D model and use the arrow buttons).
|
|
|
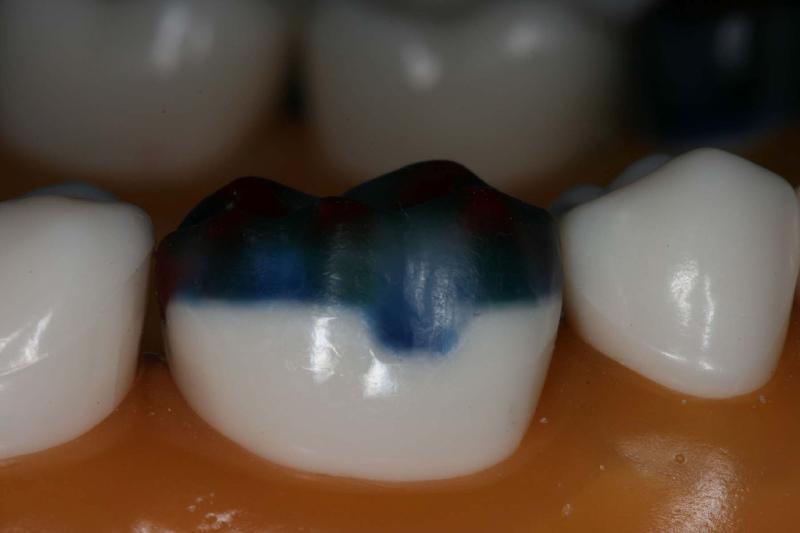
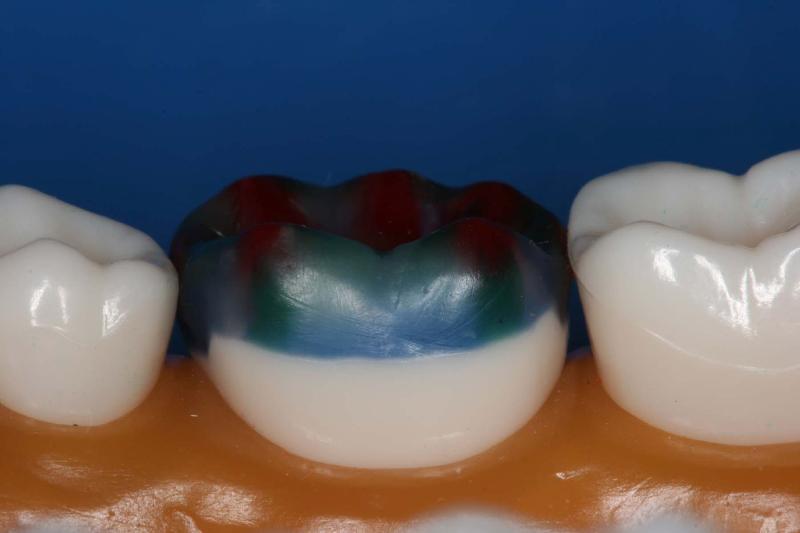
Fill in the remaining missing tooth structure using the PKT1 or PKT2 instruments using WHITE wax. Most of this step can be completed with the prepared tooth out of the typodont. Use the BEAVERTAIL/ACORN burnisher, the CD 4/5 (discoid cleoid) carver to complete the final contour and finish of the wax-added exercise. Use a piece of nylon stocking or pantyhose to complete the finish. Re-wax your margins using BLUE WAX. Use your BEAVERTAIL/ACORN burnisher to contour and seal the margins. Evaluate the margins of your wax pattern out of the typodont (using magnification). Screw the tooth back into the typodont and evaluate the completed wax pattern. After securing the prepared tooth with the completed wax pattern in the typodont, evaluate
1. mesial and distal contacts (location, magnitude and dimension)
2. buccal and lingual crests of curvature (location and extent)
3. anatomical details
4. smoothness of surface (check for subsurface voids)
5. location and magnitude of maximum intercuspation contacts
|
Final wax-added exercise
Buccal View
|
|
Final wax-added exercise
Lingual View
|

Final wax-added exercise
Occlusal view
|
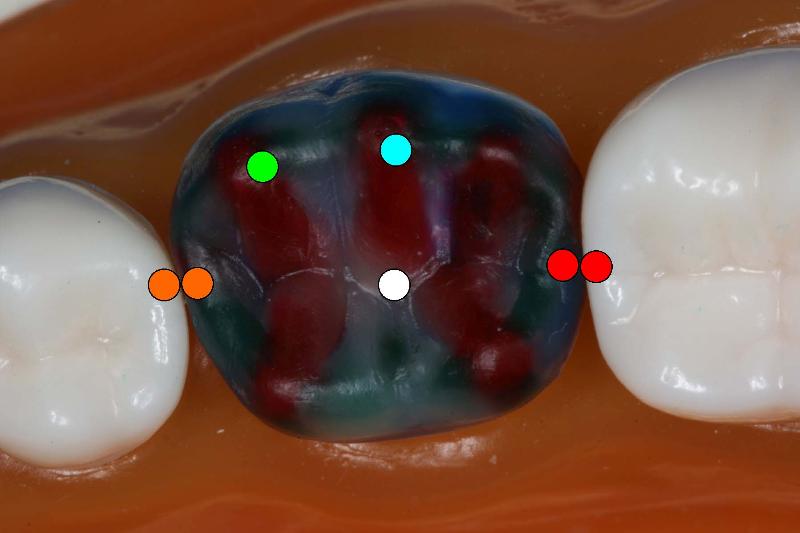
Contact position and size
The mesiobuccal cusp of the mandibular first molar (green dot) contacts the mesial marginal ridge of the maxillary first molar and the distal marginal ridge of the maxillary second premolar in maximum intercuspation.
The distobuccal cusp of the mandibular first molar (blue dot) contacts the central fossa of the maxillary first molar in maximum intercuspation.
The lingual cusp of the maxillary second premolar contacts the distal marginal ridge of the mandibular second premolar (black dot) and the mesial marginal ridge of the mandibular first molar (orange dots) in maximum intercuspation.
The mesiolingual cusp of the maxillary first molar contacts the central fossa of the mandibular first molar (white dot) in maximum intercuspation.
The distolingual cusp of the maxillary first molar contacts the distal marginal ridge of the mandibular first molar and the mesial marginal ridge of the mandibular second molar (red dots) in maximum intercuspation.
|
Final wax-added exercise
Occlusal View
|